
My only gripe was the amount of overhang the offset base had on the short section of rear dovetail. The rear section of dovetail on the Crosman steel breech measures out to about 2.116" long. The offset base, however is 2.415". The solution seems to be to shorten the base of the mount.

Just to make sure I had some flexibility for the future, I tried a couple different Leapers short scopes, and verified that several will work in this exact location. I settled on the 4X32 AO "Bug Buster" due to the close focus feature. The scope will parallax adjust from 3 yards to infinity.

After verifying eye relief a final time, did some quick layout for the cuts.

Upside down. There's an M5 threaded hole in the base for a recoil stop pin for use on spring piston guns. Unnecessary for the CO2 powered 2260, so it goes unused. Also, note that there's not a ton-o-room between the clamp hole on the side and the recoil stop hole on the bottom. I'll cut the mount off at a point in between the holes.

A 1-2-3 block makes a fine 90 degree square. I scratched a line midway between the clamp hole and the stop pin hole.

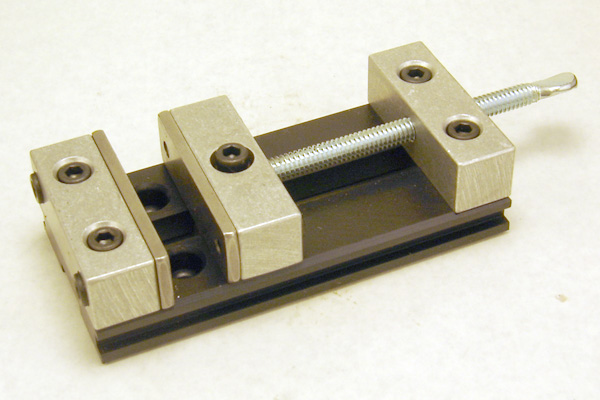
I was gonna use a hacksaw, then I remembered Nick would beat me since this blog occasionally makes use of machine tools. There's a milling adapter from Taig that turns their standard lathe into a horizontal mill. It's perfect for a small job like this. The scope mount was clamped into the milling vise and a suitable end mill was chucked into an arbor.

Took a few passes to get to depth. Used copious amounts of an aluminum specific cutting fluid.

Not shown: Flipped the part around and also took a skimming cut off the front to shorten the entire base by about 0.395". Also bolted on the clamping plate and faced the front to match.

Eyeballed the fit against the gun and it looked good. Transferred the base to the drill press and spotted a new rear clamp hole. Through drilled with a #19 bit. Clamped the base against a scrap of aluminum stock as a backer. Drilling through the mount and into the scrap aluminum left no burr on exit side of the hole.

More cutting fluid, then tapped the hole to M5 x 0.8mm. I intentionally cross-drilled (and tapped) though the stop hole. There's plenty of metal to hold threads to secure this to a zero-recoil CO2 rifle. Was it ideal? Well, no. It was almost 5% harder to keep the tap aligned.

In this shot, you can see where the front of the clamp was milled down as mentioned earlier.

With the front bolt tightened down, a transfer punch marks the location for the clearance hole in the side plate. Not shown: Drilled the clearance hole through the side plate with a #1 bit.

Bolted the side plate back on and milled the rear to length. I think that this set-up is completely wrong. Ideally, the base would be turned over so the cutting forces from the mill go downward, pressing the side plate into the base to gain suppport. This arrangement puts the load into the side plate mounting bolts. I did this for better visibility of the cut as I milled the piece by eye. But, since the part was aluminum and cutting like butter, it was a non-issue.

Looks good. Managed to not mar the rest of the base, too--always a plus.

The flip side.

I'm OK with the fine milling marks on the bottom, but the front edge needs some clean up. I sanded the front edge on a piece of emery paper set on top of a granite plate to 220 grit. It was then polished on a piece of newsprint with a smear of buffing compound. I quit when I couldn't see any more scratches.

Sent it to the paint department. Some quick masking and a shot of Rust-Oleum satin black enamel on the raw surfaces provided a virtually perfect match.

It's really tough to find the paint lines.


It fits! With proper clamping pressure and no ugly overhang. The gun is even easy to load.

Looks good. Now, I just need to make another custom bolt handle...
