Saturday, May 1, 2010

Gecado Diana Model 5 Pistol Disassembly, Part 2

On I go.

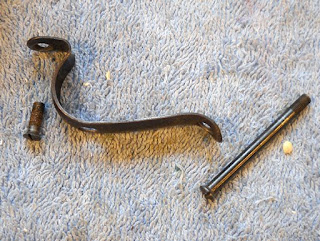
Pushed this pin out.

Came out easily.

Removing the pivot bolt lock screw.

Barrel and breech removed.

Lack of a breech seal...need to make one.

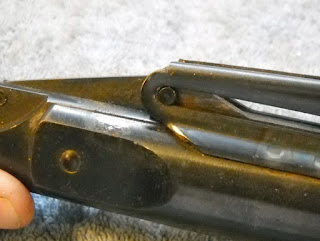
That rivet looks like it won't come out, being flared out at the ends.

But it pushed out easily.
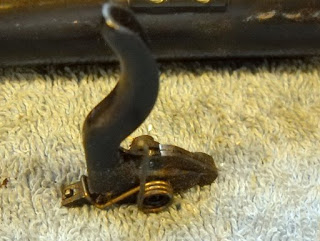
Trigger & spring.

Cocking transfer bar slides forward, up and out.

Trigger pull screw on the right, lock screw on the left.

Mist be missing the plunger/ball on the end?

Disassembled.

Lock screw removed.

The end cap lock screw was missing.

Cap unscrewed.

Just like the other Diana 5.

The piston was stuck so I resorted to this insane solution, my home made slide hammer vise grips holding a bent hook tool...

Which gripped the inside of the piston slot.

Braced in the vise with a piece of brass rod through the pivot holes.

The piston was pulled out.

Unlike any other Diana piston head.

And the head is loose...If anyone has taken apart a similar Diana and has a picture of a good condition piston head like this I'd love to see it. As is I'll probably whip up a replacement dovetailed head that matches the later 5 and solder it in.

You can see the step inside the piston that the head butts up against.

Now to get to work fixing the problems and getting it to shoot.

Friday, April 30, 2010

Gecado Diana Model 5 Pistol Disassembly, Part 1

I couldn't pass up the offer of a beat up early (but post war) Gecado branded Diana 5 pistol.

Rusty. Notice the tapered barrel.

This is before Diana went with the ugly yet comfortable plastic grips/stock.

A sinister development, in that someone removed the thumb rest so it could be shot left handed. Not sure how or whether I'll fix that.

That's probably a crack.

The sights are different than the later Diana 5, and the windage screw is broken off and missing the adjustment nut.

Trigger guard, it all starts here.

Just as on the later Diana but different...

Action removed from the grip/stock.

The rear sight removed by unscrewing one screw and the elevation screw.

Different from the later model.

Hmm...how to take that apart, wiggle, wiggle.

Elevation screw & detent.

More disassembly.

The windage screw is part of the stamping and sheared off. That'll be fun to fix.

Different again from the later Diana and more adjustable.

Lower screw locks the spring adjuster.

Removing the lower screw first.

And teh spring comes out through the hole.

The parts. Bored yet?

Transfer bar thingamajig slides out. Just like all the postwar Diana pistols.

More to come...

Tuesday, April 27, 2010

Match Grips for a Daisy 7X7 Part 3 Final

With the palm shelf more or less attached to the right grip, and tired of sanding, I stained the left side grip and the shelf.

Used two coats of Varathane American Walnut.

Producing this.

Got out the Dasco Pro scratch awl and sharpened the tip.

Let the stippling begin. There are plenty of ways to texture the wood using punches or a Dremel tool. For whatever reason, I gravitate toward doing this the hard way.

tap, tap, tap.... It's a laborious process.

Left side done.

Finished up the sanding on the right grip and stained it.

Just need to stipple the right grip panel.

There's a lot more surface to stipple on this side.

A couple evenings after work while watching late night TV got the grips to this point.

I liked the look, but I'd missed the mark. After 50 or so shots, it was apparent that the palm shelf needed to adjust upward a bit more. I was slightly less than thrilled considering how much time I had into the project at this point. Felt kinda stupid. I should have shot the gun more after getting the shelf fitted--before staining and all the stippling. After thinking about it for a while, I thought there might be an easy fix.

I decided to make the shelf taller rather than make a completely new one . Cut an outline of the shelf from a piece of 1/4" walnut scrap--always looking for the best part of grain.

I was thinking that if I dress it up enough, maybe it won't be so bad.

Cut a sliver of thin maple.

For, uh, contrast. (or maybe height)

Sanded off the wood stain from the top of the shelf and went looking for the Gorilla Glue.

About four hours later in the clamps. Together (hopefully) forever.

Sanded and re-stained. Made every effort to not get walnut stain on the maple.

Success! Got the needed height and I like the added visual appeal of the spacer.


Nice burl to complement the left side. The height problem turned out to be a rather fortuitous mistake.

Well, these certainly beat the old plastic grips. I'm calling it on this one. Took 3 posts and a couple weeks of working here and there. I need a different project next that doesn't involve so much sawdust.