Back to the 118 magazine.

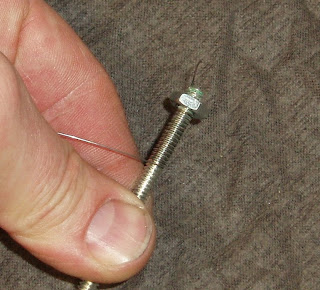
Searched three hardware stores for a suitable spring. No dice. Gotta make the spring. Bought some various gauges of music wire. Lacking a power feed on the lathe, I opted to wind the wire along a piece of all-thread to make the coils. A foot of #10-24 is about the correct diameter. Ideally, the coils would be further apart, but I'll make do and stretch the spring out. As I needed to anchor the wire at one end of the rod, I cut a slot and chased the threads.

Wire lays in the slot.

Nut threads down and locks the wire in place.
Wind the wire into the valleys of the thread. Need to keep constant tension on the wire--or it just unwinds.
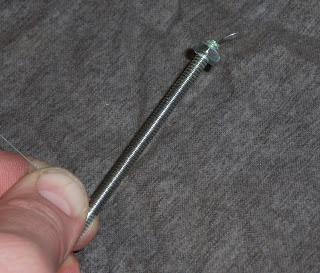
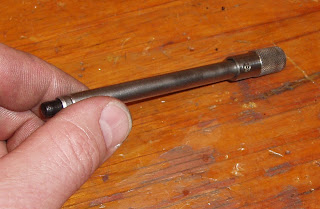
This is over two-and-a-half feet of music wire.

I found out the hard way that the wire will not set to the size of the thread by itself. Gently clamped the wire to the rod with a vise-grip so it couldn't unwind.

Heated the wire with a torch for a moment then quenched.

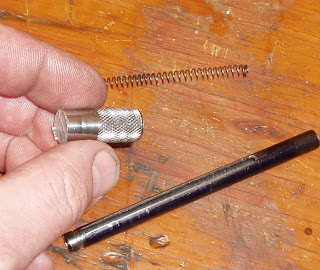
Removed the nut and unscrewed the spring.

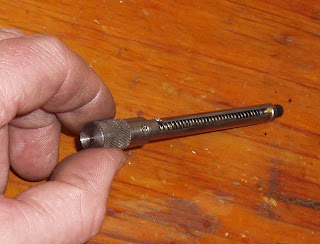
I pulled and stretched it out a bit to get the necessary length then finished the ends. The small piece of material on the right is delrin (or acetal--if you prefer). I turned it to 0.230" to fit inside the magazine.

Then, turned about half the piece of delrin down to 0.160" to fit inside the spring. Left a shoulder for the spring to bear against. This will be the magazine follower. Made some comparisons to the original 118 mag and measured the amount of follower protrusion.

Marked the spot on the new follower for the stop pin that will allow the same extension. Drilled about 3/4 of the way through with a #43. That drill size was chosen to allow a pin diameter that would slide freely through the milled slot in the magazine body.

Chucked a piece of 0.125" brass rod and turned down to 0.090" diameter.

I'll cut off the end to make a tiny rod for the follower stop pin.

Cut a groove near the end of the magazine. This engages a detent inside the 118's receiver, holding the magazine in place.

Knurled a piece of 0.500" drill rod to start the end cap for the mag.

Squared up the ends and machined down one end. Cut a defining edge up to the knurl.

Spotted

Drilled just shy of an inch deep. Didn't break through. The bottom of the hole will serve as the seat for the follower spring.

Eyeballed a good spot for a couple tiny retaining screw holes in the end cap.

Countersunk

Wire brushed the old finish off the body, then transferred the holes from the cap and drilled with a #50.

Tapped #2-56.

Test fit. The end cap secures with opposing #2-56 stainless steel screws.

I'd been pondering (agonizing?) how to lock the follower back to load the pellets. The original 118 mag uses a spring clip to hold the follower. The spring releases the follower automatically by simply inserting the mag into the gun. Mine won't be quite as complicated. I went back to the milling set up and cut a forward slanting angle at the rear of the follower pin slot. The follower pin can now be pulled back, then turned slightly to lock in the rearmost position. After inserting the mag into the gun, it should take just a thumbnail flick to unlock the follower.

Had to play with the height of the brass follower stop. If too high, it won't slide into the gun. Needs to be flush with the diameter of the mag body.

Test assembly.

A few different angles.

Disassembled for finishing.

Blued the cap and body with Birchwood Casey Perma Blue Paste.

Follower locked back.

A better pic of the loaded magazine. Ten .22 cal Crosman wadcutters fit perfectly.

The 118's receiver has a slot to show remaining pellets in the mag. Clever. I'm absolutely dumbfounded that the "prototype" mag functions perfectly. Ten shots as fast as you can work the bolt and squeeze off the shots. As I didn't want to disassemble the original mag for measurements, it was a nice surprise that this worked without endless tweaking and re-work.


