Sunday, December 28, 2014

Benjamin Trail Nitro Piston Pistol--Part 1

Bought this Benjamin Trail pistol at a flea market several months ago.  It looked to be new in the box and after some haggling, I got it for around $50 or thereabouts.   Knew going into it that there have been some "issues" with the pistol--mainly problems with it shooting high.


Here it is with the cocking assist lever installed.


 De-stalled.


Oh, good.  Fiber optic sights. 


Seems you can't get away from them nowadays.   The bright dots make it very difficult to achieve a repeatable sight picture--at least on a paper target.


The rear sight is pretty flimsy--lot of play both horizontally as well as vertically. 


Along with the sights, the long and heavy trigger pull has been almost universally panned.  A longer adjusting screw (It's a 3mm) will take care of most trigger complaints. 


While digging through the bolt assortment, I swapped out all the phillips head stock fasteners for allens.


The grip is aggressive and took some getting used to.  There's a couple rub points, esp right under the trigger guard. 

This has taken so long because I couldn't get the gun to shoot worth a damn.  I shot some awful groups, changed pellets a couple times and shot even worse.  Couldn't get the pellets in the same neighborhood.  I mean I was missing the 8" x 12" backstop at 30 feet.  This thing was a complete dog.  Crosman owes me a quart of paint to touch up the concrete block wall it was so bad.  Since I've got a pile of other guns that are actually, you know, accurate, the Nitro Piston was set aside until my memory faded and I forgot just how bad things were.


Initially, I had hopes that getting rid of the horrible sights would make thing better.  Used a heat gun to break the front loose.


Pulled right off after about a minute at low heat.


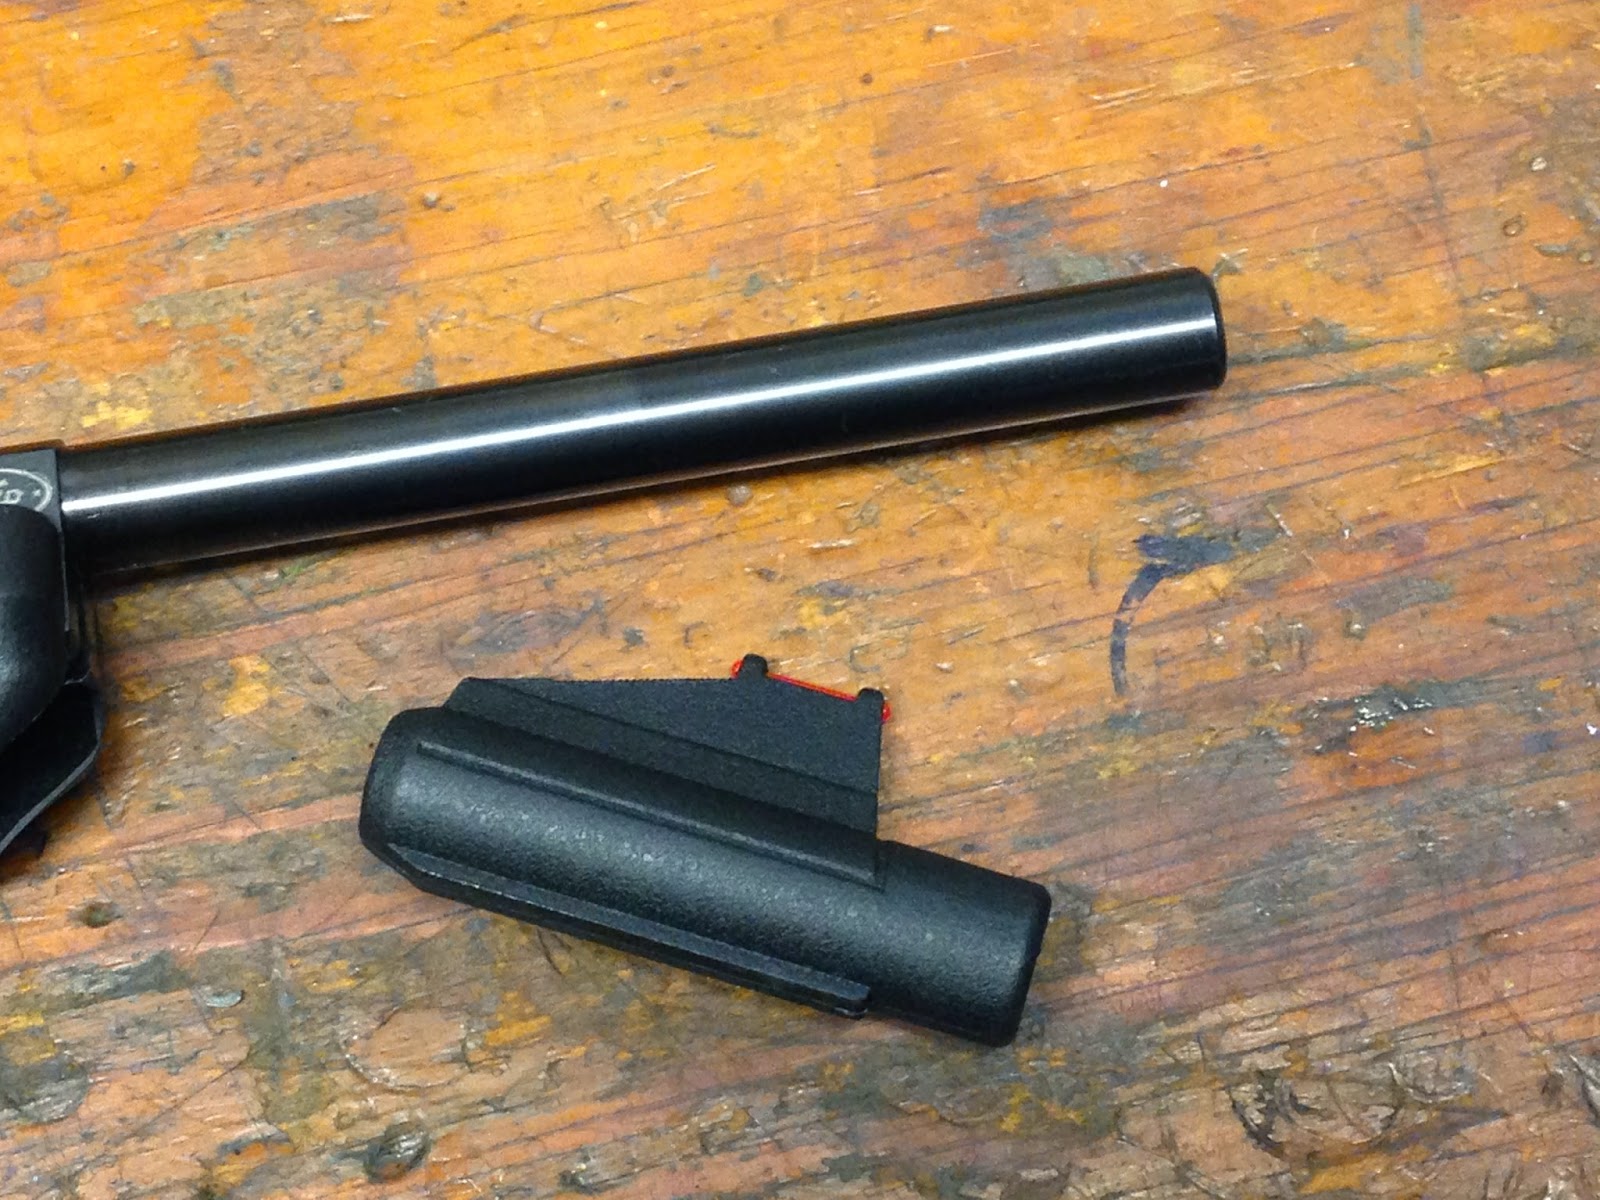
An angled flat on top of the muzzle.  At this point I started digging through my collection of pieces and parts to see if anything looked promising.


This part of my experimentation didn't pan out for me, though it would work with a different rear sight.  This is the front sight unit from a AR2078 --it was a snug fit to the 15mm NP barrel.


Removed the globe insert and installed a post.


Used an M5 cross bolt to clamp it to the gun.  Note that the proper way to mount this sight is to groove the barrel for a cross pin.  This is virtually identical to how break-barrel pistols used to be equipped with front sights.   The protective hood shields your hand from the sharp sight edges while cocking.   Archer Airguns sells these for about $15 here.  After getting this installed, I shot another group and realized that the grouping problems weren't related to poor sights.


 Looked at the breech seal next. 


 Really didn't see a problem.


 Removed it and found a steel shim.


Checked my breech seals and found I actually had a new one, so I tried that--with and without the steel shim.  The gun leaked slightly without the shim.   Looked at the spring plunger and found that the tension was very, very low.  I think the barrel lock-up is inconsistent and the cause of the inaccuracy.


Removed the four screws and pulled the action out of the stock.


Removed the e-clip at the rear of the anti-beartrap lever.


Then the return spring and lifted it off.  I see that it's already slightly bent.  Superb.


Barrel pivot lock screw...


Barrel pivot.  The shim washers are plastic.  I didn't get to it today, but in my experience, these plastic washers are nothing but trouble for consistent lock-up.   Bronze will be a good replacement material.


Knocked out the roll pin and there was zero preload on the plunger.  Zip.  None.  I actually found this encouraging.


Found a longer spring of about the same wire size.  It's about 2 coils longer.  If I do this again, I'll make it 3.


A small nail made for a fine slave pin.  Tapped the roll pin back in.


The bent anti-beartrap lever is humped slightly in the middle.


Put it all back together with a cheap  red dot and a muzzle weight from the old TF79 project.


I can live with this.  Just one called flier on the right.  Fifteen shots with a mix of RWS Super H-Points and Geco wadcutters.   Some bronze pivot washers and an even stiffer plunger spring should make this even better.  Lot of work.  A typical Crosman 2240 or 1377 will outshoot the Nitro Piston pistol all day long with no mechanical effort--or wall painting.

Sunday, October 19, 2014

Vacation Time

Wow, Nick and I are really off the back on getting anything posted lately.   Hopefully we can turn that around soon.  In the meantime, this is all I've got.

I was in the Laurel Highlands of Pennsylvania last week for some R&R.  Lot of great hiking opportunities around Ohiopyle.  


We were fortunate to be able to do some shooting on the property we'd rented for the week near Confluence, PA.   The weather forecast was pretty grim with rain almost every afternoon/evening, but I did manage to send a few pellets downrange.  Knowing ahead of time that the weather would be uncooperative, I packed just a single air rifle and air pistol.  Brought the still relatively new-to-me Beeman R1 Laser and a Webley Tempest.  Here's a few pics.


Finally, (and this is unrelated to the vacation) I bought a Benjamin Nitro Piston pistol a few weeks ago and have been trying to make it do what we all want--a decent trigger and hit what I aim at (well, most of the time).  The factory trigger is pretty much awful.  Long and heavy.  In the trigger guard, there's a screw that's supposed to adjust the trigger, but it's too short to reach the sear.  A longer (about 2X longer) screw gave the desired effect.  Still working on the accuracy part of the equation, and that's a multifaceted problem.  The sights supplied with the gun are terrible.  A red dot didn't help much either. The detachable cocking piece doesn't work too badly, but of course, the impact point varies if it's left on the gun or taken off for the shot.  I'm not sure what I envision, but I am going to try a few things and generate a couple blog posts along the way.

As always, thanks for reading.

Sunday, August 10, 2014

Back to the Patriot

Got back to the Patriot the other day.  Wanted to reduce the airflow through the transfer port to create a slightly larger cushion of air in front of the piston.  The hope was that the "ping" from the piston hitting the front of the compression tube would go away.  Tore the gun down again and jumped in.


Didn't bother to go through pin gages to find the actual size, but a #20 drill bit (0.161") just fits.
So, the transfer port is huge--about 0.035" larger than "normal".  There are a lot of ways to reduce the port size.  Could've drilled it out even larger, threaded the hole and made up several set screws with various sizes of through holes.  Or made interchangeable sleeves that are secured with a perpendicular setscrew.  Could've done a bunch of work, but the gun's firing cycle was so harsh, and with the end result unknown, I couldn't find the motivation to spend the hours doing the machining.  The fastest, easiest way to see if this idea would work would be a simple reducing sleeve bonded into place.  I've done this very same fix in the past on a Haenel 303-Super.


Turned a piece of brass to 0.160" then drilled a 0.135" hole down the center.


Leaving a very thin walled sleeve.


Mixed up some quick setting JB epoxy...


and pressed the sleeve in just below flush.


I know.  Not much to it.


No protrusion to catch on the edge of the base block.


While it was apart, I removed the main pivot's locking bolt. 


And found a replacement socket head cap screw.  Just taking it to length.


Also reduced the head's diameter by a couple thou.  Here it is re-blued.


And installed.  Well, the pivot bolt looks a bit ragged.  Might need to turn a new one at some point.

The sleeve is a success!  The noise is gone and the rifle is producing just over 28 foot pounds with H&N Baracuda Hunter X-Treme pellets(670 fps).   H&N wadcutters are moving out at 740 fps. We'll call this a victory for the moment.  The gun still has a pile of recoil no doubt due to the sheer weight of the huge mainspring and the heavy walled piston.  Reducing the piston weight may just be on the list.