Wednesday, December 20, 2017

AR-15 Stock Adapter for a Crosman 22XX -- Part 2

The Crosman project for my wife continued to evolve over the last few weeks.


I replaced the short 2250 forend with a longer forend from a Benjamin Marauder pistol.  Cut down a 24" Crosman 2260 barrel to 20" and made a carbon fiber muzzle brake.  The grips were also updated to the newest style from Crosman's P1377 pistol. 


Mounted a UTG hand stop.  A long #8-32 screw holds the hand stop as well as anchors the front of the forend to the barrel band.


This is an AR-15 accessory designed for the KeyMod rail.  The radii don't match, with a gap between the hand stop and the forend, so no modification to either part was necessary. 


Turned a press fit plug from acetal to fill the unused pressure gauge hole.   It actually doesn't look so bad in person.  Think the diameter ended up at 1.025".


A UTG 11mm to Picatinny adapter carries the theme.  I was pushing for a UTG 4-16X scope, but my wife thought it was getting a bit heavy.  A Crosman labeled 3x9 with AO is lighter and should provide all the magnification a CO2 rifle really needs.


MFT stock fully shortened.


And extended.


We'll need to get some range time before taking it much further.  I'm still debating whether or not to convert it to .177.  I expect that might give a flatter trajectory and a bit more range for those tin cans.

Thanks for checking in.


Tuesday, November 21, 2017

Zebrawood Grips for a Crosman 22XX

I found a set of well-figured zebrawood grips on eBay a few weeks ago for about $30 shipped.  The finger grooves weren't particularly well defined, nor did the fit look all that seamless to the grip frame.  But the price was right and they appeared to have enough material to work with, so I bought them.  Looked at it as an opportunity to spend only a little more money than the lumber alone and be finished in an afternoon.  

No "before" pics.  Imagine blocky grips with finger grooves not quite fully realized.  They weren't terrible--they just didn't look finished.

After about two hours of screwing around in the garage, this is what I had:


I re-profiled the grips to better fit the frame, deepened the grooves and softened some edges.


A little sanding and they were presentable.  Arrow Wood Finish was rubbed into the grips each day for several days in a row.  Two minutes spent oiling each day, tops. 

Thanks for checking in.  More soon.

Saturday, November 11, 2017

AR-15 Stock Adapter for a Crosman 22XX -- Part 1

My wife has been nursing a shoulder injury for several months now. So when we found ourselves about to leave on a vacation that allowed for some airgun shooting, I knew I had to figure something out for her.  Spring piston guns were definitely out.  Single or multi-stroke pneumatics were likewise off the table.  I didn't want to pack the extra gear for a PCP, nor could she handle the weight of our Marauder with her damaged labrum.   Figured a CO2 gun would be the best combination of light, easy to cock and easy to shoot. 


Threw together a Crosman 2250 with an airsoft-level AR-15 M4 collapsible stock and an inexpensive 3-9X Crosman scope.  It was a weird sort of "Frankenstein" gun made up of various airgun cadaver parts that were laying around.  I'd changed it to a .20 caliber to match the ammo selection of the HW97 and R1 we were also taking.  Over the course of the vacation, the Crosman was shot by both of us to the tune of about 300 shots.  Spending that kind of time with it made us appreciate the one-finger cocking, adjustable stock and overall lightweight package.  The range, though, was a bit hampered by the short barrel and we both wanted a bit more quality than the cheap stock had to offer.   After returning home, a plan started to formulate for an upgraded version.


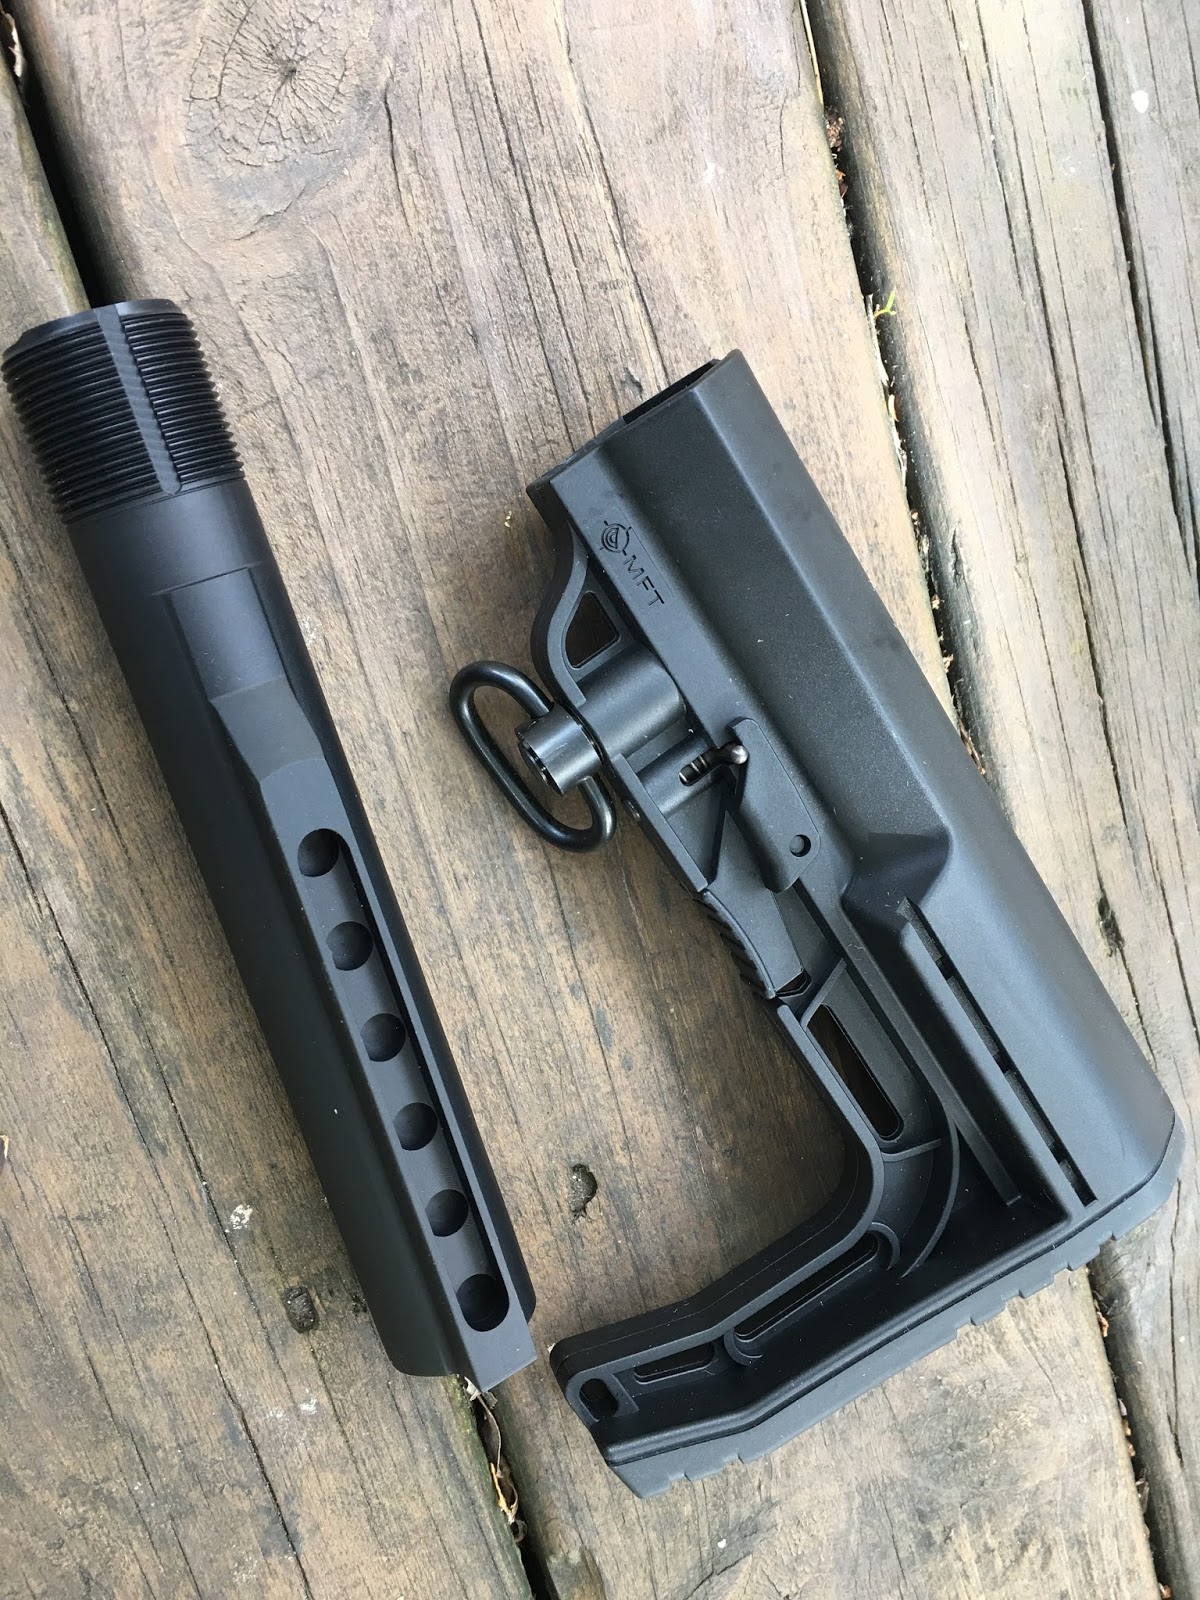
I ordered up a Mission First Tactical lightweight stock and a mil-spec AR-15 buffer tube extension.


In a weird twist for this blog, I don't think I'm going to show any actual machining pictures this time around.   But I'll walk it through.  I cut the threads off the end of the AR buffer tube.  An unmolested, mil-spec tube is on the bottom for comparison.


Drilled a hole in the bottom.


Then I turned an adapter on the lathe from a piece of 1" diameter pre-heat treated 4140 steel, and drilled and tapped some holes.  


This replaces the gas tube's end plug in the Crosman.


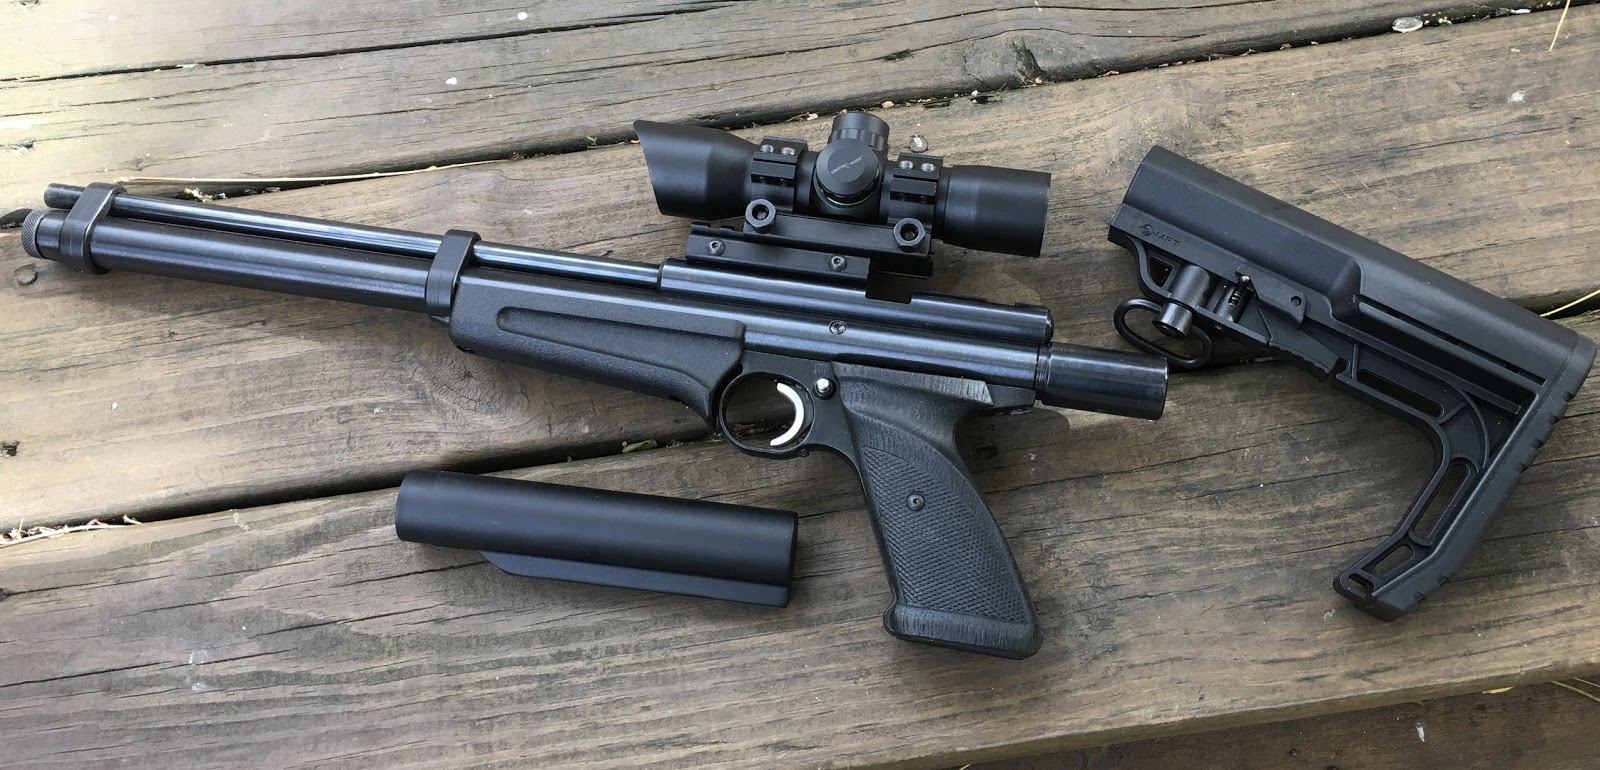
Rebuilt the gun using a rifle length gas tube from a Crosman 2260.  A slightly longer barrel (in .22 cal this time) was also installed. 


Buffer tube slides over the adapter and a single screw solidly locks it in place.  Any AR-15 collapsible stock will now fit.


Stock installs over the buffer tube and has six length positions.


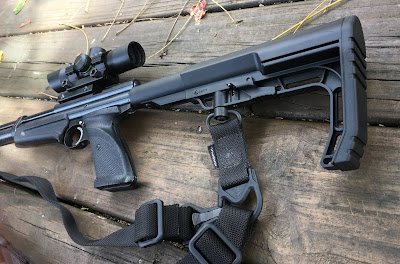
The MFT stock has provisions for a QD sling swivel.  Probably come up with a forward sling mounting point in the near future.  For now, a single-point sling will be fine.


Doubt the red dot sight will stay.   It gives up too much compared to the scope that my wife likes to use to hit those aluminum cans and spinners at 35+ yards.  Also doubt it will remain a .22 caliber.   I find myself wanting a longer forend as well.   So, it's quickly come a long way, but it's still a work in progress.

Thanks for checking in. 

Friday, October 6, 2017

Daisy 881 Quick Fix

8810188102
I pulled the check valve and pump cup from a donor 880 that seemed in good condition. All o-rings were replaced.
88103
That weird hard plastic or rubber buffer makes no sense to me.
8810488105
Some more detail on the barrel clamp, I found the barrel wiggled a bit, which means that air was leaking past the seal.
88106
Forgot to take a picture, but I ended up lapping the bottom of the clamp w/sandpaper on a flat plate until it made better contact.
88107
The gun wouldn’t hold more than one pump of air after reassembly, which meant that the check valve wasn’t working. So I decided to experiment and heated it and a round bushing up with a heat gun until they were moderately warm/hot. Then I compressed the seal (making the skirt flare out more) with the arbor press and held it until it cooled.
88108
As you can see, the seal on the left has taken a set and is larger in diameter than the non-working seal on the right. I don’t know how long this will last, but the rifle works now and my neighbor seems happy.
88109
Not a bad result for 10 pumps with a premier 7.9gr. pellet.

Monday, September 25, 2017

Daisy 881 Disassembly Part 2

On I go…

IMG_7858

Just a picture for later…

IMG_7860IMG_7862IMG_7863

Some lever details.

IMG_7866

BB port cover.

IMG_7867IMG_7870

Getting the bolt out was confusing, it’s in two parts, one of which enters from the outside of the slot.

IMG_7872IMG_7873

Just a little dirty…

IMG_7874

The barrel shroud slides off.

IMG_7876

Barrel is held in place by a clamp.

IMG_7880IMG_7881

Urethane transfer port seal – which I think is well designed actually.

IMG_7884

One pin to remove the trigger/exhaust valve assembly

IMG_7885IMG_7887

The compression tube is filthy.

IMG_7888

Inlet valve. The cup seal is hard to find – let me know where to get one for what it should cost (a buck or two) if you know.

IMG_7892IMG_7894

The trigger pin is only meant to come out one way – and of course I pushed it out the wrong way.

IMG_7895

Notice the broken butt stock piece.

IMG_7897IMG_7899

Trigger group.

IMG_7900IMG_7901

Exhaust valve looks very similar/identical to those used on the 717 series pistols.

IMG_7912

All the parts…

IMG_7937

I took apart the pump piston, I don’t know what the broken bits are – plastic? fiber? Looks like one from a donor gun will fit tthough.

IMG_7940

I don’t think those pieces sticking out the side are anything but uncut sprue…

IMG_7943

Donor butt stock looks mostly the same.

IMG_7946

Now we’ll see if I can get it to work. It may be that the cleaning and o-ring replacement is all it needs, at least I hope so.